

If your morning brew tastes a little bitter or stale, figuring out how to clean a Cuisinart coffee grinder is usually the best way to fix the problem. Old coffee oils coat the grinding chamber and burrs, turning rancid over time and ruining the delicate flavors of your favorite beans.
Taking a few minutes to master proper maintenance keeps your machine running smoothly and ensures every cup tastes fresh. Here is a comprehensive breakdown of the tools, techniques, and troubleshooting steps needed to keep your equipment in top shape.
Gathering Your Cleaning Supplies
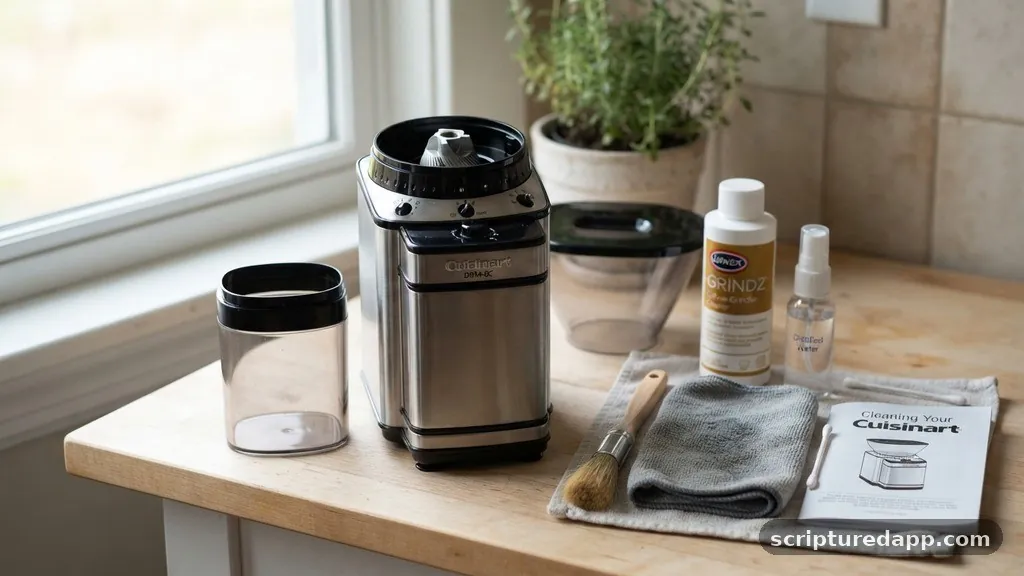
Gathering your cleaning supplies before you start prevents interruptions and ensures you have everything needed to protect delicate machine parts. Most cleaning routines require everyday household items rather than specialized commercial cleaning solutions. Having these items on hand makes routine maintenance quick and stress-free.
To do the job right, you will need a small soft-bristled brush, a microfiber cloth or sponge, and mild dish soap. Avoid harsh chemical cleaners or abrasive scouring pads, as these can scratch plastic components and strip protective finishes off metal parts. For stubborn oil residue, a small amount of white vinegar can also prove useful.
Below is a quick inventory of recommended tools and their primary purposes for maintaining your equipment:
| Tool or Material | Primary Purpose | Safety Precautions |
|---|---|---|
| Soft-bristled brush | Sweeping away fine dust from burrs | Do not use wire bristles |
| Microfiber cloth | Wiping down exterior and housing | Keep slightly damp, never wet |
| Mild dish soap | Washing removable plastic components | Rinse thoroughly to remove taste |
| Uncooked white rice | Absorbing oils in emergency cleanings | Use sparingly to avoid jamming |
Step-by-Step Cleaning for Blade Grinders
Blade grinders are popular for their simplicity, but their enclosed chambers require careful attention to reach trapped bean fragments. Always unplug the device before starting any maintenance to prevent accidental activation. Taking apart the accessible components allows you to reach deep into the grinding zone.
Start by tilting the base over a trash can and tapping gently to dislodge loose grounds. Use your soft brush to sweep away remaining fine dust stuck to the stainless steel blades and walls of the chamber. Never submerge the motor base in water, as this destroys the internal electrical components permanently.
Wipe down the interior and exterior housing using a slightly damp cloth. If your model features a removable grinding bowl, wash it gently in warm, soapy water before drying it completely. Reassemble the components only when every single part is completely dry to prevent moisture from causing electrical shorts or rust.
Maintaining Burr Grinder Models
Maintaining burr grinder models requires a slightly more methodical approach because flat or conical burrs trap significant amounts of coffee oils. To begin, remove the hopper by twisting it counter-clockwise and lifting it straight up. Empty any remaining beans back into an airtight container or a bag.
Carefully lift out the upper burr assembly, noting how it locks into place for easier reassembly later. Use your brush to sweep away impacted grounds from both the upper and lower burrs. You can wipe the plastic hopper and lid using soapy water, ensuring you rinse them thoroughly before putting them back on the machine.
Burr alignment is critical for achieving a consistent grind size, so handle the metal components with care. Never use metal tools or screwdrivers to pry out stubborn coffee compaction, as this can nick the cutting edges. Once clean, lock the upper burr securely back into the housing and test the locking mechanism before adding fresh beans.
Clearing Jams and Clogs
Even with regular maintenance, machinery can occasionally seize up due to oily dark roast beans or foreign debris. Even with regular maintenance, oils build up and cause beans to bridge together inside the narrow throat of the hopper. When this happens, the motor may hum without turning the grinding mechanism.
To safely resolve these issues regarding clearing jams and clogs, unplug the appliance immediately. Empty all beans from the hopper and inspect the chute with a flashlight to locate the obstruction. Use a wooden toothpick or a non-conductive plastic tool to gently dislodge any compacted coffee clumps.
If the blockage is located deep within the burrs, disassemble the removable upper burr housing to gain direct access. Vacuum out the loose particles using a handheld vacuum attachment if brushing proves insufficient. Never force the motor to run while jammed, as this can burn out the thermal fuse and ruin the appliance.
Addressing Power and Reset Concerns
Electrical issues and safety switches sometimes prevent your machine from turning on, mimicking a mechanical failure. Many modern kitchen appliances feature built-in thermal protection to prevent the motor from overheating during extended use. If your machine suddenly stops mid-grind, let it rest for fifteen minutes to cool down before trying again.
Check the power cord for any visible fraying, and ensure it is plugged firmly into a working wall outlet. Some models feature an integrated addressing power and reset concerns safety button underneath the base or near the power switch. Pushing this small tactile button can often restore functionality after an electrical overload.
If the appliance still refuses to start after checking the power supply and clearing any potential blockages, the internal fuse may have blown. At this stage, consult the manufacturer manual or contact customer support for replacement parts rather than attempting amateur wiring repairs.
Establishing a Regular Routine
Establishing a regular routine transforms tedious chores into a simple, effortless habit that takes less than five minutes each week. Wipe down the exterior housing and clean the bean hopper every seven to ten days depending on your usage volume. Deep-cleaning the burrs or blade chamber on a monthly basis prevents stale oils from contaminating your fresh roasts.
Keeping a dedicated brush next to your coffee station serves as a visual reminder to sweep out residual grounds after every single use. This proactive habit drastically reduces the frequency with which you need to perform deep chemical or water cleanings. Your palate will reward you with cleaner, more vibrant coffee flavors every morning.
Consider keeping a simple maintenance log or checklist on your refrigerator to track when you last serviced your equipment. Consistency is the ultimate secret to extending the lifespan of kitchen appliances and getting the most value out of your investment.
Frequently Asked Questions
How often should I clean my coffee grinder?
You should wipe out loose grounds after every use to prevent oil buildup. For optimal performance, perform a thorough cleaning of the burrs or grinding chamber every two to four weeks depending on how frequently you brew coffee.
Can I wash removable parts in the dishwasher?
Most removable plastic components like bean hoppers and grounds bins are top-rack dishwasher safe. However, washing them by hand in warm, soapy water extends their clarity and prevents warping from high dishwasher heating cycles.
Is it safe to use rice to clean my grinder?
Running dry white rice through a grinder can absorb stale oils and clear out loose residue in an emergency. However, commercial grinding cleaning tablets are much safer because raw rice starches can sometimes gum up the internal motor.
What should I do if the motor stops working?
First, unplug the unit and check for a jammed bean or a tripped thermal reset button. Let the motor cool down for at least fifteen minutes before plugging it back into a known working electrical outlet.
Conclusion
Mastering how to clean a Cuisinart coffee grinder ensures your morning routine remains uninterrupted and your coffee always tastes exceptional. By investing a few minutes each week into basic maintenance, you protect your equipment from premature wear and oil buildup.
Take the next step by grabbing your cleaning brush today and giving your machine the care it deserves. We would love to hear about your coffee maintenance tips in the comments below.
Best Coffee Grinders Hub guide best budget coffee grinder guide check out this buying guide Best Coffee Grinders Hub coffee grinder reviews and ratings BestCoffeeGrindersHub.com Best Coffee Grinders Hub buying guide Best Coffee Grinders Hub guide choosing the right grinder Best Coffee Grinders Hub coffee grinder buying tips Best Coffee Grinders Hub buying guide best coffee grinder guide BestCoffeeGrindersHub.com Best Coffee Grinders Hub best coffee grinder for espresso best coffee grinder guide Best Coffee Grinders Hub guide burr vs blade grinder guide best coffee grinder for espresso Best Coffee Grinders Hub guide Best Coffee Grinders Hub check out this buying guide Best Coffee Grinders Hub coffee grinder buying tips Best Coffee Grinders Hub reviews best coffee grinder guide bestcoffeegrindershub.com coffee grinder reviews and ratings choosing the right grinder